

Blog result textured surfaces

Blog posts

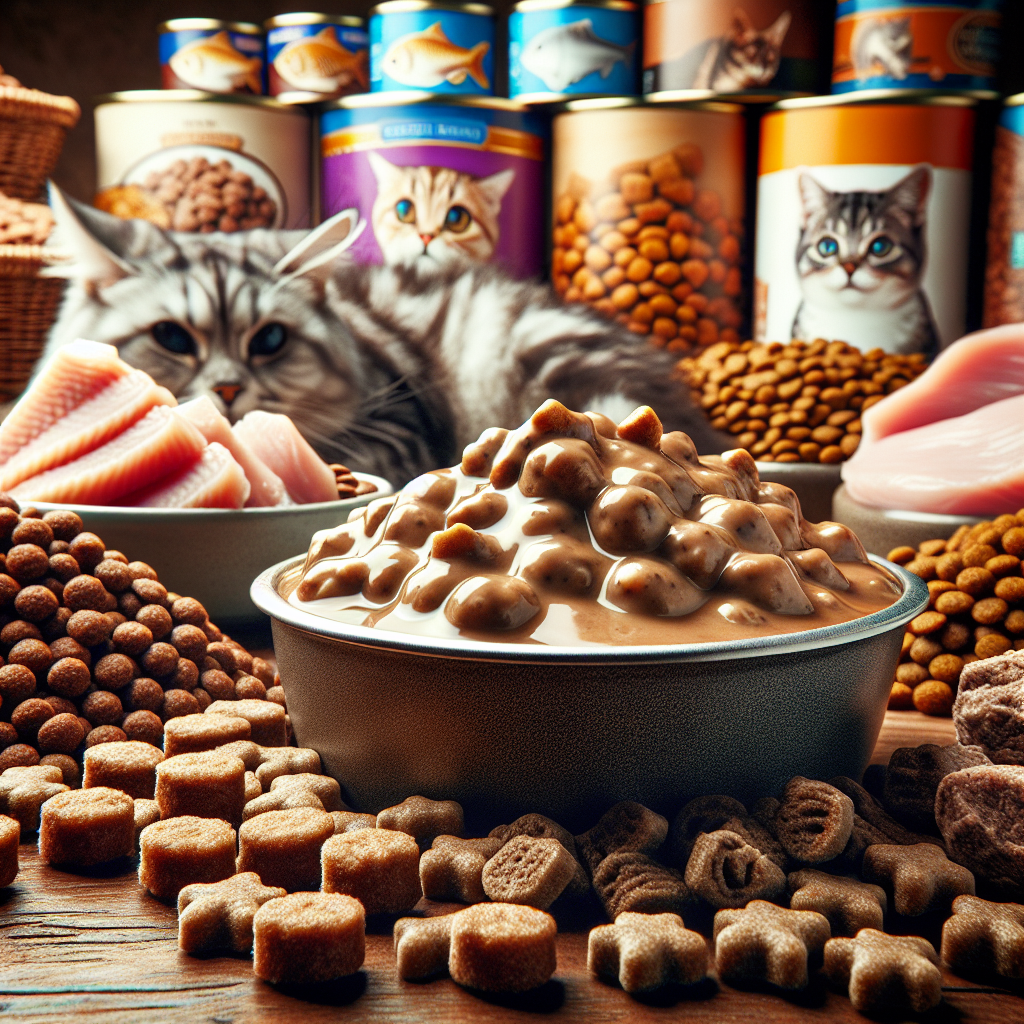
The Best Cat Food for Farmers' Cats
# The Best Cat Food for Farmers' Cats
Cats, with their agile grace and independent spirit, have long been companions to those living in rural settings. Farmers' cats, in particular, play a crucial role in the agricultural ecosystem by controlling rodent populations and providing companionship. However, ensuring their nutritional needs are met is essential for their health and vitality. In this article, we delve into the ideal cat food options for farmers' cats, providing insights into their dietary requirements and exploring the benefits of farm-fresh cat food.
Understanding Farmers' Cats and Their Dietary Needs
Farmers' cats typically lead active lives, roaming fields, barns, and homesteads. Their active lifestyle demands a diet that not only meets their energy requirements but also supports their overall health. Unlike indoor cats, farmers' cats may require more calories, protein, and certain nutrients to thrive in their environment.
Nutritional Needs of Farmers' Cats
The nutritional needs of farmers' cats are influenced by various factors, including their level of activity, age, and overall health. Protein, a crucial component of a cat's diet, supports muscle maintenance and repair. Cats are obligate carnivores, meaning their bodies are designed to derive nutrients primarily from animal-based sources. Essential amino acids such as taurine, which is found abundantly in animal tissues, are vital for their health.
Fats provide a concentrated source of energy and are necessary for the absorption of fat-soluble vitamins. Meanwhile, carbohydrates, although not essential in high amounts, can offer supplemental energy. It is important to ensure that the cat's diet is balanced, with appropriate levels of vitamins and minerals to support their immune system and overall well-being.
Exploring Farm-Fresh Cat Food Options
Farm-fresh cat food offers a promising solution for meeting the unique dietary needs of farmers' cats. The concept revolves around providing cats with minimally processed food made from high-quality, locally sourced ingredients. This approach mirrors the natural diet of felines, emphasizing the importance of animal-based proteins and nutrients.
Benefits of Farm-Fresh Cat Food
- Nutrient-Rich Ingredients: Farm-fresh cat food typically contains whole meats, organs, and bones, offering a more natural and nutrient-dense diet. These ingredients are closer to what cats would consume in the wild, ensuring they receive essential amino acids, vitamins, and minerals.
- Fewer Additives and Preservatives: By minimizing processing and avoiding artificial additives, farm-fresh cat food reduces the risk of exposing cats to potential allergens and harmful chemicals. This aligns with a holistic approach to pet wellness.
- Sustainability and Local Sourcing: Many farm-fresh cat food brands prioritize sourcing ingredients from local farms, supporting sustainable agriculture practices. This not only benefits the environment but also ensures the freshness and quality of the ingredients.
Evaluating the Cost of Farm-Fresh Cat Food
While the benefits of farm-fresh cat food are evident, cost considerations play a significant role in the decision-making process for pet owners. The price of farm-fresh cat food may vary based on factors such as the quality of ingredients, brand reputation, and packaging. However, it is crucial to weigh the long-term health benefits against the initial cost.
Investing in high-quality nutrition can potentially reduce veterinary bills by promoting better health and preventing diet-related issues. Additionally, supporting local farmers and sustainable practices contributes to the well-being of the broader community.
Farmers Dog for Cats: A Viable Option?
The Farmers Dog, a company known for its fresh dog food, has garnered attention for its innovative approach to pet nutrition. While their primary focus is on canine diets, the principles underlying their product development can be applied to creating similar offerings for cats.
The concept of extending the "farmers dog" philosophy to cats involves crafting fresh, balanced meals tailored to feline dietary needs. This includes incorporating high-quality proteins, essential nutrients, and a balanced ratio of macronutrients.
Pros and Cons of Adapting the Farmers Dog Model for Cats
- Pros:Emphasizes fresh, whole ingredients.Customizable meals to cater to specific dietary requirements.Potential for improved health outcomes and longevity.
- Cons:Requires adaptation to meet the distinct nutritional needs of cats.May involve higher costs compared to conventional cat food options.
Selecting the Best Cat Food for Your Farm Cat
Choosing the right cat food for farmers' cats involves considering their lifestyle, health status, and dietary preferences. Here are some key factors to keep in mind:
- Consult with a Veterinarian: Before making any dietary changes, consult with a veterinarian to ensure the chosen food meets the specific needs of your cat. They can provide guidance on portion sizes, nutrient requirements, and any potential allergies.
- Quality of Ingredients: Prioritize cat food that lists high-quality animal proteins as the main ingredients. Avoid products with excessive fillers, artificial additives, or by-products.
- Feeding Guidelines: Follow feeding guidelines provided by the manufacturer, adjusting based on your cat's activity level and weight.
- Monitor Health and Behavior: Regularly assess your cat's health, coat condition, and energy levels. Any significant changes may indicate the need for dietary adjustments.
Conclusion
Farmers' cats play an invaluable role in rural life, and providing them with the best nutrition is essential to their health and well-being. Farm-fresh cat food, with its emphasis on quality ingredients and holistic nutrition, offers a promising option for meeting the dietary needs of these hardworking felines.
As pet care continues to evolve, it is crucial for new pet owners to stay informed about the latest innovations and trends in cat nutrition. By prioritizing the health and happiness of farmers' cats, we not only support their vital role in agriculture but also enhance the bond between humans and their feline companions.

Exploring Homemade Cat Food Options

Cats are obligate carnivores, which means their diet primarily consists of animal-based proteins. They require certain nutrients, such as taurine, arachidonic acid, vitamin A, and vitamin B12, which are naturally found in animal tissues. A deficiency in these nutrients can lead to severe health issues, including heart problems and vision impairment.
The Importance of Protein
Protein is the cornerstone of a cat's diet and plays a vital role in muscle development, tissue repair, and overall health. Unlike humans, cats cannot efficiently utilize plant-based proteins, making animal-derived protein sources essential. Chicken, beef, and fish are excellent sources of protein, but it's important to ensure variety to prevent nutrient deficiencies. When preparing homemade cat food, focus on lean cuts of meat and consider incorporating organ meats for added nutritional benefits.
The Role of Taurine
Taurine is an amino acid that is critical for a cat's heart and eye health, as well as reproductive function. It is naturally found in animal tissues, particularly in heart and muscle meats. Unlike other animals, cats cannot synthesize taurine from other amino acids, making it an essential component of their diet. When crafting homemade meals, ensure adequate taurine levels by including taurine-rich ingredients, or consider supplementation under veterinary guidance.
Essential Fats
Fats provide cats with a concentrated source of energy and are crucial for the absorption of fat-soluble vitamins such as A, D, E, and K. Omega-3 and omega-6 fatty acids are important for maintaining skin and coat health, as well as supporting cognitive function. Fish oil, chicken fat, and flaxseed oil are excellent sources of these essential fatty acids. When preparing homemade cat food, balance is key; too much fat can lead to obesity, while too little can result in nutrient deficiencies.
Vitamins and Minerals
Vitamins and minerals are critical for a range of physiological functions, including bone development, immune support, and cellular repair. Cats require specific vitamins, such as vitamin A, which is found in liver, and B vitamins, which are prevalent in animal tissues. Additionally, minerals like calcium and phosphorus are vital for bone health. A well-rounded homemade cat diet should include a variety of animal-based ingredients to meet these nutritional needs, and supplementation may be necessary to address any gaps.
Homemade Cat Food: The Alternatives

Creating homemade cat food can be a viable alternative to commercial wet cat food, especially when you aim to provide your pet with fresh, quality ingredients. Here are some alternatives to consider:
Raw Diets: The BARF Approach
Raw diets, often referred to as BARF (Biologically Appropriate Raw Food), consist of raw meat, organs, and bones. This diet mimics what cats would naturally consume in the wild, offering a diet rich in natural enzymes and nutrients. However, careful consideration must be given to balance the nutrients, and the risks of bacterial contamination should be mitigated through proper handling and storage. It's essential to source high-quality, fresh meat and ensure your cat's diet is supplemented with necessary vitamins and minerals.
Cooked Meals: A Safer Alternative
Cooked meals provide a safer alternative to raw diets while still allowing you to control the quality of the ingredients. It involves cooking meat, such as chicken or fish, and supplementing it with essential nutrients. Cooking can help reduce the risk of bacterial contamination and make certain nutrients more digestible. Ensure that the meals are free from toxic ingredients such as onions and garlic, and consider using a slow cooker for convenience and even cooking.
Supplementation: Filling Nutritional Gaps
To address potential nutritional gaps in homemade diets, supplements are often necessary. Taurine, calcium, and specific vitamins can be added to ensure a comprehensive dietary profile. Consult your veterinarian for guidance on appropriate supplementation, as the wrong balance can lead to health issues. There are many commercial supplements available that are specifically formulated for homemade cat diets, making it easier to provide a balanced meal.
Inexpensive Homemade Options: Budget-Friendly Choices
For those seeking a cheap alternative to cat food, consider utilizing less expensive cuts of meat or incorporating organ meats, which are nutrient-rich and cost-effective. These ingredients can be sourced from local butchers or farmers' markets, often at a fraction of the cost of premium cuts. Additionally, buying in bulk and freezing portions can further reduce costs. Experiment with different recipes to find a balance between nutritional adequacy and affordability.
What to Feed Your Cat When Out of Cat Food

In a pinch, you can resort to some temporary solutions if you find yourself out of cat food. Here are some emergency options:
Cooked Chicken or Fish: A Quick Fix
Plain, cooked chicken or fish without seasoning can serve as an emergency meal for your cat. Ensure that all bones are removed to prevent choking hazards, and avoid using oils or spices that could upset your cat's stomach. This option provides a good source of protein and can be easily prepared in minutes. Keep some frozen chicken or fish fillets on hand for such emergencies.
Eggs: A Protein-Packed Snack
Cooked eggs are a good source of protein and can be fed to your cat in moderation. Avoid adding salt or other seasonings, as these can be harmful to cats. Scrambled or boiled eggs are easy to prepare and can be mixed with other ingredients for a more balanced meal. Eggs should be used sparingly as a treat rather than a staple due to their high fat content.
Meat Baby Food: A Convenient Substitute
Certain brands of meat-based baby food without additives or seasonings can be a convenient, short-term substitute for cat food. These products are generally easy to digest and can be mixed with other ingredients to enhance nutritional value. Always check the label to ensure there are no onions, garlic, or other harmful ingredients. Baby food can be a lifesaver in emergencies, but it should not replace a balanced diet long-term.
Considerations and Cautions
While homemade cat food offers numerous benefits, it's important to approach it with caution. Ensuring balanced nutrition is challenging and requires careful planning and consultation with a veterinarian or a pet nutritionist. Some common pitfalls include:
Imbalanced Diets: Avoiding Nutrient Deficiencies
Failing to provide a balanced diet can lead to nutrient deficiencies over time, affecting your cat's overall health and well-being. A diet lacking in essential nutrients can result in conditions such as anemia, bone deformities, and organ dysfunction. Regularly reviewing your cat's diet with a professional can help identify and correct any imbalances. Homemade diets should be tailored to meet the specific needs of your cat's age, weight, and health status.
Bacterial Contamination: Safety First
Particularly with raw diets, proper handling is crucial to prevent health risks associated with bacterial contamination. Raw meat can harbor bacteria such as Salmonella and E. coli, which can be harmful to both cats and humans. Practicing good hygiene, including washing hands and surfaces, is essential when preparing raw meals. Freezing meat before use can help reduce bacterial load, and regular veterinary check-ups can monitor your cat's health.
Toxic Ingredients: Knowing What to Avoid
Always avoid ingredients that are toxic to cats, such as chocolate, onions, and garlic. Even small amounts of these can cause serious health issues, ranging from gastrointestinal upset to organ failure. Educate yourself on common household foods that are unsafe for cats and be vigilant in checking labels when using pre-packaged ingredients. A comprehensive list of toxic foods can be obtained from your veterinarian or pet nutritionist.
Conclusion
Homemade cat food can be a rewarding venture that allows you to have greater control over your pet's diet, provided that you are diligent in ensuring nutritional balance. By understanding your cat's dietary needs and exploring various alternatives to canned cat food, you can offer your feline friend a diet that is both healthy and satisfying.
When considering a transition to homemade cat food, it is always recommended to consult with a veterinarian to tailor the diet to your cat's specific health requirements. With careful planning and the right knowledge, you can confidently embark on providing your cat with nutritious homemade meals. Remember, a well-fed cat is a happy cat, and a happy cat means a happy home.

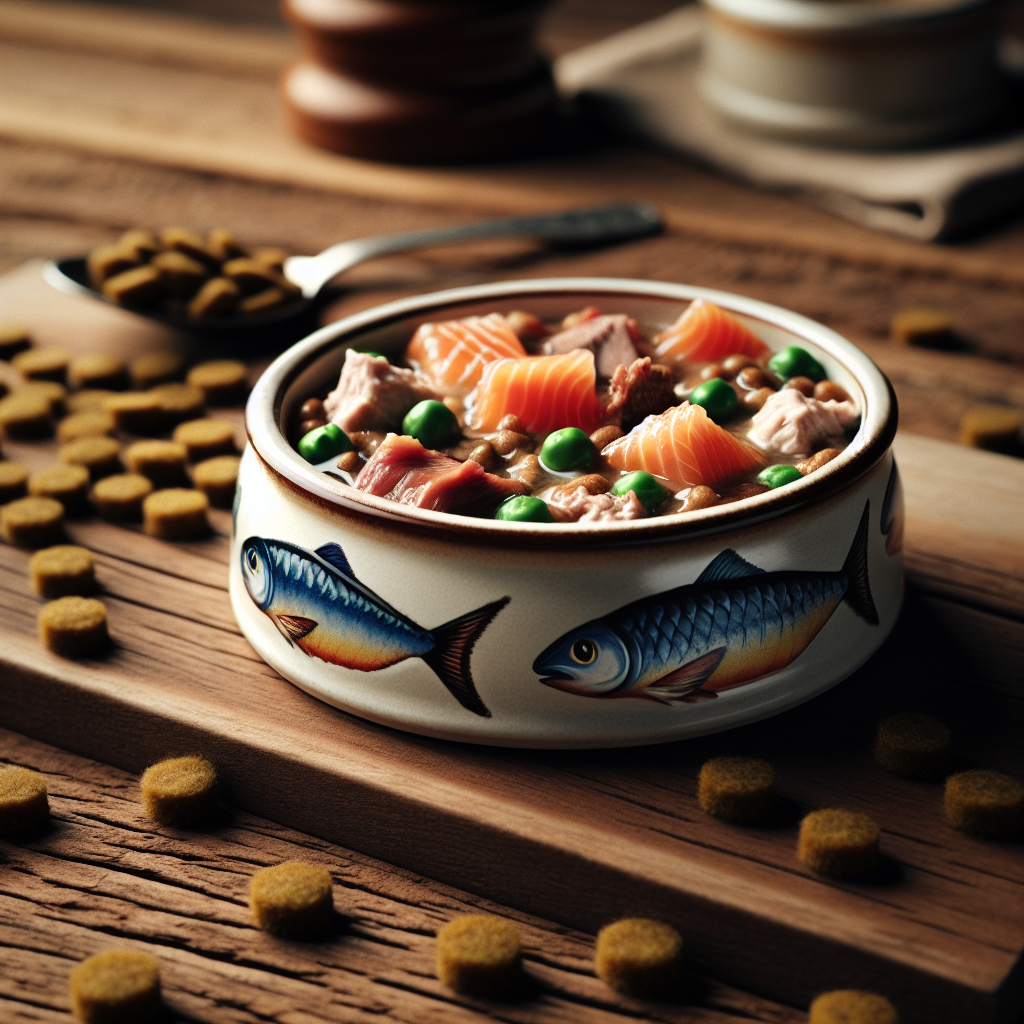
Is canned cat food cooked or raw
Canned cat food is a staple in many feline households, yet there is often confusion surrounding its preparation and nutritional value. Is it cooked or raw? Understanding this is crucial for new pet owners striving to provide the best care for their pets. This article delves into the intricacies of canned cat food, shedding light on its production, nutritional aspects, and best practices for feeding.
Understanding Canned Cat Food: Cooked or Raw?
!Canned_cat_food_varieties()
The question of whether canned cat food is cooked or raw is a common one among pet owners. The answer is that canned cat food is cooked. This cooking process is essential for several reasons, including safety, preservation, and palatability.
The Cooking Process
Canned cat food undergoes a cooking process known as canning. During canning, the ingredients—comprising meat, vitamins, minerals, and sometimes grains—are mixed and sealed in cans. The cans are then heated to high temperatures under pressure, effectively sterilizing the contents. This process not only kills harmful bacteria and pathogens but also ensures the food remains safe and shelf-stable for extended periods.
Nutritional Implications of Cooking
Cooking food alters its nutritional profile. While some nutrients may be diminished during the cooking process, many essential amino acids and vitamins are preserved or enhanced. The heat treatment makes proteins more digestible and eliminates the risk of pathogens, offering a balanced and safe meal for your feline friend.
Can You Freeze Canned Cat Food?
Pet owners often wonder about the feasibility of freezing canned cat food. While technically possible, freezing canned cat food is generally not recommended.
Effects of Freezing
Freezing can change the texture and flavor of canned cat food, potentially making it unpalatable to cats. Upon thawing, the food may become mushy or separated, which may not appeal to your pet's senses.
Best Practices for Storage
For optimal freshness, store unopened cans in a cool, dry place. Once opened, any unused portion should be transferred to an airtight container and refrigerated. This helps maintain the food's quality and prevents spoilage. It's advisable to use the refrigerated food within 3-5 days to ensure maximum freshness and nutrient retention.
Do Cats Like Cold Food?
!Cat_eating_food()
Cats have preferences when it comes to the temperature of their food. Most cats prefer food that is at room temperature, which mimics the warmth of freshly caught prey. Cold food straight from the refrigerator may not be as enticing.
Enhancing Palatability
To make refrigerated canned food more appealing, consider warming it slightly. You can do this by placing it in a microwave-safe dish and heating it for a few seconds or by adding a small amount of warm water. Be cautious not to overheat, as excessively hot food can be dangerous and off-putting for your cat.
The Benefits of Canned Cat Food
Canned cat food offers numerous advantages, making it a popular choice among pet owners. Here are some key benefits:
High Moisture Content
Canned cat food contains a significant amount of moisture, which is beneficial for cats, particularly those who do not drink enough water. Proper hydration is crucial for urinary tract health and overall well-being.
Rich in Protein
Cats are obligate carnivores, requiring a diet rich in animal protein. Canned cat food typically contains higher levels of protein compared to dry food, catering to your cat's dietary needs.
Enhanced Flavor and Texture
Many cats find the flavor and texture of canned food more appealing than dry kibble. The savory aroma and soft consistency can entice even the pickiest eaters.
Innovations in Canned Cat Food
The pet food industry is continually evolving, with innovations aimed at improving the quality and variety of canned cat food. Manufacturers are incorporating novel ingredients and advanced formulations to cater to diverse feline needs.
Grain-Free and Limited Ingredient Options
For cats with dietary sensitivities or allergies, grain-free and limited ingredient canned foods provide alternative options. These formulations minimize the risk of adverse reactions while maintaining nutritional adequacy.
Functional Foods
Functional foods enriched with probiotics, antioxidants, and omega-3 fatty acids are becoming increasingly popular. These ingredients support digestive health, immune function, and promote a lustrous coat.
Making Informed Choices
When selecting canned cat food, it's essential to consider your cat's unique dietary requirements, preferences, and any health concerns. Consulting with a veterinarian can provide valuable insights into the best options for your feline companion.
Reading Labels
Pay close attention to the ingredient list and nutritional analysis on the label. Look for foods that list a high-quality source of animal protein as the primary ingredient and avoid those with excessive fillers or artificial additives.
Considering Life Stages
Cats have different nutritional needs at various life stages. Ensure that the canned food you choose is appropriate for your cat's age, whether they are a kitten, adult, or senior.
Conclusion
!Cat_and_canned_food()
Canned cat food is a cooked, nutritious option that can play a vital role in your cat's diet. Understanding the preparation, storage, and benefits of canned food empowers pet owners to make informed decisions that enhance their cat's health and happiness. By staying abreast of the latest innovations and adhering to best feeding practices, you can provide your feline friend with a diet that is both enjoyable and nutritionally balanced.
In summary, while canned cat food is cooked, it remains a highly beneficial dietary choice for cats. Its high moisture content, rich protein profile, and palatable nature make it a favorite among felines. As a new pet owner, embracing these insights will set you on the path to fostering a healthy, happy life for your beloved pet.

Exploring the History of Tender Vittles
The pet care industry is in a constant state of transformation, driven by innovations, changing consumer preferences, and new scientific insights into animal health and nutrition. As pet ownership continues to rise globally, more people are seeking ways to ensure their pets lead healthy, happy lives. This pursuit has led to a wide range of pet food options, each promising unique benefits for our furry companions. The evolution in pet care is not just about improving the quality of life for pets but also about enhancing the bond between animals and their owners.
Among the myriad of cat food options that have graced store shelves over the years, Tender Vittles holds a special place in the annals of feline nourishment. This semi-moist cat food was a pioneer in its category, introducing a new way of thinking about feline diets. Its history reflects broader trends in pet care, including the shift towards more convenient, health-focused options. As consumers become more educated about pet nutrition, the demand for innovative and nutritionally sound products continues to grow, influencing the entire pet food landscape.
The Genesis of Tender Vittles

Tender Vittles cat food made its debut in the pet food market in the late 1970s, a time when pet care was beginning to see significant advancements. Developed by the Ralston Purina Company, it was introduced as an innovative alternative to the traditional dry kibble and canned wet food, which dominated the market at the time. The defining characteristic of Tender Vittles was its semi-moist texture, designed to provide the benefits of both dry and wet cat food, catering to both the nutritional needs of cats and the convenience sought by their owners.
This new form of cat food quickly gained popularity due to its unique offering. The soft texture was particularly favored by felines who found it easier to chew compared to hard kibble, making it an excellent choice for older cats or those with dental issues. Moreover, the product was packaged in convenient pouches, which made it easy for pet owners to serve and store. This convenience factor was a significant selling point, as it addressed the needs of busy pet owners looking for quick and simple feeding solutions without compromising the quality of their pets' diets.
The Appeal of Semi-Moist Cat Food
Tender Vittles was not just about convenience; it also addressed specific nutritional needs that were often overlooked in other cat food formats. The semi-moist format allowed for a higher moisture content than dry kibble, which is beneficial for cats' urinary tract health. Cats are naturally low drinkers and rely on their food to provide a significant portion of their water intake, making moisture-rich foods crucial for their well-being. At the same time, Tender Vittles avoided the messiness often associated with wet food, striking a balance that appealed to both cats and their owners. This balance made Tender Vittles an attractive option for many cat owners seeking a middle ground between health benefits and ease of use.
Nutritional Composition
Tender Vittles was formulated with a blend of proteins, fats, and carbohydrates to meet the dietary requirements of cats, ensuring they received a balanced diet with every meal. The inclusion of meat by-products, grains, and essential vitamins and minerals aimed to provide a complete and balanced diet that could support overall feline health. However, it's important to note that the formulation also included preservatives and humectants to maintain its semi-moist texture, which raised some concerns among pet nutritionists regarding their long-term health effects. These additives were necessary to preserve the product's texture and shelf life but sparked discussions about the potential health implications of such ingredients.
As the pet food industry evolved, so did the scrutiny over ingredients used in pet products. While Tender Vittles was a frontrunner in offering a semi-moist option, the inclusion of artificial preservatives eventually became a point of contention. This led to increased awareness and demand for more natural formulations, pushing the industry to rethink ingredient quality and transparency. Pet owners began to seek foods that aligned more closely with their own health values, driving a significant shift towards cleaner, more natural pet food options.
Rise in Popularity
Throughout the 1980s and 1990s, Tender Vittles enjoyed a strong market presence. Its unique offering, coupled with effective marketing campaigns, positioned it as a go-to choice for many cat owners. The brand became synonymous with semi-moist cat food, carving out a niche in the competitive pet food industry. This period marked a golden era for Tender Vittles, as it captured the hearts of both pets and their owners, becoming a staple in many households.
Marketing Strategies
Ralston Purina employed several innovative marketing strategies to promote Tender Vittles. Television commercials often highlighted the product's palatability, featuring contented cats eagerly devouring their meals, which resonated with pet owners looking for food that their pets would love. Additionally, the convenience of the pouch packaging was emphasized in advertising, appealing to busy pet owners looking for hassle-free feeding solutions that didn't compromise on quality. The marketing efforts effectively communicated the product's unique benefits, helping to solidify its place in the market.
The brand also engaged in promotional campaigns that included free samples and coupons, allowing pet owners to try the product without commitment. This strategy helped increase its visibility and adoption among new customers. By tapping into consumer desires for convenience and quality, Tender Vittles managed to maintain its popularity for several decades, despite the growing competition in the pet food sector. This period of success showcased the brand's ability to adapt to market demands and consumer preferences.
Decline and Discontinuation
Despite its initial success, Tender Vittles faced challenges that ultimately led to its decline. By the early 2000s, changing consumer preferences and increasing scrutiny over pet food ingredients began to impact its popularity. The use of artificial preservatives and the perception of lower-quality ingredients led some pet owners to seek alternatives that aligned more closely with modern nutritional standards. This shift was part of a broader trend towards more natural and health-conscious pet food options, driven by a more informed consumer base.
What Happened to Tender Vittles Cat Food?
In 2007, production of Tender Vittles was officially discontinued. The decision was influenced by several factors, including declining sales and the shifting landscape of pet food preferences. As pet owners became more informed and health-conscious, there was a growing demand for natural and organic options that promised higher quality and fewer additives. The rise of specialized diets and premium pet food brands further contributed to the decline of products like Tender Vittles that relied on older formulations.
The discontinuation of Tender Vittles marked the end of an era but also signaled the beginning of new opportunities in the pet food industry. Companies began to innovate, focusing on developing products that met the evolving expectations of health-conscious consumers. This shift has led to a more diverse array of cat food options available today, catering to a variety of dietary needs and preferences. While Tender Vittles is no longer available, its impact on the industry is undeniable, paving the way for new innovations in pet nutrition.
Legacy and Influence
Although Tender Vittles is no longer available, its legacy endures in the pet food industry. It paved the way for the development of other soft cat food products that sought to combine the benefits of moisture-rich diets with convenience. The product's success highlighted the importance of catering to both the pet's health and the owner's lifestyle, a balance that continues to influence product development in the industry. Today, cat food brands continue to innovate, offering a variety of textures and formulations to cater to the diverse needs of felines.
Soft Cat Food Alternatives
For pet owners seeking alternatives to Tender Vittles, there are numerous soft cat food options available today. Brands have responded to the demand for healthier choices by offering products that are free from artificial preservatives and made with high-quality ingredients. These contemporary options maintain the soft texture that many cats enjoy, without compromising on nutritional integrity. The market now includes grain-free options, organic formulas, and diets tailored to specific health concerns, providing pet owners with a wealth of choices to suit their cats' unique needs.
In addition to traditional brands, there has been a rise in boutique and artisanal pet food companies that emphasize transparency and premium ingredients. These companies often focus on small-batch production, ensuring that each product meets high standards of quality and nutrition. For pet owners, this means more options and greater confidence in the food they choose for their beloved companions. The legacy of Tender Vittles lives on in these modern offerings, reflecting a continued commitment to improving the lives of our pets.
Conclusion
The story of Tender Vittles is a testament to the ever-changing dynamics of the pet food industry. As a once-beloved product, it highlights the importance of innovation and adaptation in meeting the evolving needs of both pets and their owners. While Tender Vittles itself may be a thing of the past, its influence persists, inspiring new generations of pet food products that prioritize health, convenience, and taste. The lessons learned from its rise and fall continue to shape the industry, encouraging ongoing research and development to meet consumer expectations.
For new pet owners navigating the world of cat nutrition, understanding the history and evolution of products like Tender Vittles provides valuable insights into making informed choices for their furry companions. Embracing the advancements in pet care and nutrition ensures that our beloved pets receive the best possible care, contributing to their overall well-being and happiness. The journey to finding the perfect cat food is an opportunity to learn about our pets' needs and preferences, fostering a deeper connection with them.
In the quest for the perfect cat food, whether you're reminiscing about Tender Vittles or exploring new horizons, the journey is filled with discovery, learning, and, most importantly, the joy that our feline friends bring into our lives. As the industry continues to evolve, pet owners can look forward to more options and better products that enhance the health and happiness of their pets. The legacy of Tender Vittles serves as a reminder of the progress made and the exciting potential for future innovations in pet nutrition.